Friday, April 26

Tutorial - Blending Two Colours


Today I want to share the technique I use when blending two different colours together, in this case, a blue and a green. The technique would be similar for most other colour combinations, but always do a test run before starting on the final piece.


Start by stamping your image on a suitable piece of cardstock with the appropriate ink. I'm colouring with alcohol markers so I've chosen a piece of blending card and a water-based ink pad, which is light in colour for a "no-line" result.


I'm using four shades of green and five shades of blue to colour the little pterodactyl, as well as the 0 blending pen. I'll also add some pink and yellow to his hat and streamer for a bit of contrast. 


Start by mapping out the colours. I want him to have a green beak, stomach and tops of his wings, so that's where I'm adding my lightest shade of green. Then I colour the rest of his body with the lightest shade of blue, overlapping and blending the colours where they touch.


Come back in with the lightest green to blend the colours a little more. It's important to use colours that are around the same shade and intensity rather than one really dark and one really light.
(In cases where you want to mix a light and a dark, you'll need to bring them both to about the same tone - but that's for another tutorial).


Add the darkest green to the shadow areas of the image, keeping it in the "green places". Blend the shadows out with the remaining markers until you come back to the original colour.


Now repeat the process with the blue areas. Again, you'll want your darker blue markers to be around the same tones as your green ones as they will need to blend together where the colours meet. For example, under the wing and around the bottom of the belly.


You can blend the dark blues with the dark greens, or the medium blues with the medium greens. If you're using alcohol based markers, be careful not to blend a colour that is several tones lighter into one that is darker or you'll break up the pigment and end up with a mottled appearance.


Time to colour the rest of your image, starting with the eyes. I'm using two of the greens as well as a fine point black pen for the pupil. Don't forget to add a little spot of bright white to help give life to the eyes.


Some pink and yellow markers add a nice contrast and an extra pop of colour.


Stamps:

Thursday, April 25


Selected, retired digital stamps at an incredibly low price for just 48 hours.
No rainchecks. No repeats.

Petite Fleur
digital stamps
They shall grow not old,
as we that are left grow old;
Age shall not weary them,
nor the years condemn.
At the going down of the sun
and in the morning
We will remember them.

Tuesday, April 23

Old Goat's Club


Judy has used the Goat Club set of digital stamps to create two fun birthday cards with a cheeky twist. She kept the colour schemes quite minimal for a fantastically coordinated look that's suitable for just about anyone.


Sunday, April 21

A Good Day To Be Happy

To create the "confetti" for my happy little elephant, I used markers to add dots around the background then circled each one with a fine line pen. Alternatively, you could use small stamps, patterned paper, or even little hand-drawings to suit the theme you're after.


Stamps:

Saturday, April 20

G.O.A.T.

Gotta G.O.A.T. in your life? Here's a cute alternative to a thank you card, or even a quirky way to let someone special know what they mean to you.


Digital Stamps:

Friday, April 19

Hooray!


Kathy has very cleverly "tied" balloons to each letter of the large sentiment she placed at the bottom of her card, using a black pen. She also added some light grey shadows to the sentiment and balloons from the new Bountiful Balloons set to give them a 3D effect.


Wednesday, April 17

Balloon Banner

A little glossy accents goes a long way!
Check out that fabulous shine.


Digital Stamps:

Monday, April 15

Goat Club


Carla has coloured two of the images from the new Goat Club set of digital stamps to create her cards. As you can see from the photos, she added lots of beautiful texture to give the impression of hair, and carefully followed the growth pattern for a more realistic look.


Saturday, April 13

Tutorial - Quad Twisted Easel Card


I have a fun card to share with you today, which is actually five cards in one. Although I've just used the little easel cards as decoration, they are definitely suitable for messages, images or sentiments if you wish.


1. You'll need a 12" x 6" piece of cardstock for your base; four 51/2" x 23/4" pieces of cardstock; four 23/4" x 23/4" pieces of cardstock; and embellishments, including four dimensional items to act as anchors (I'm using sentiments popped up with foam tape).


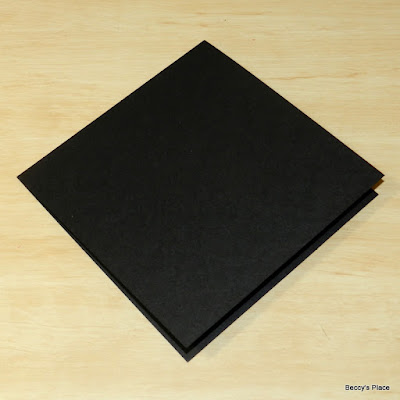
2. Score and fold the 12" x 6" piece of cardstock in half to form a 6" x 6" card base. Set aside.


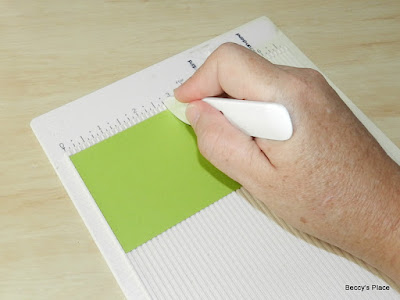
3. Place one of the 51/2" x 23/4" pieces of cardstock horizontally on your scoreboard, and score at 23/4".


4. Score from the top of the centre score line to the bottom right hand corner of the cardstock. The line should be a 45 degree angle. You can use a scoreboard insert to make it easier, or simply fold the right-hand side of the cardstock in half on an angle. See the template below for correct placement.


5. Fold along the score lines to form the easel card base. Repeat steps 3 - 5 for each of the other 51/2" x 23/4" pieces of cardstock to create your four easel cards.


6. Place one of the easel cards on the desk in front of you with the fold at the top and the opening directly in front of you. We're going to secure each of the 23/4" x 23/4" pieces of cardstock to the left hand triangle on each easel card.


7. Apply glue to the triangle section of the left-hand side of the card (see the photo below). Place the square of cardstock over the glue to secure in place and form the easel.


8. Repeat with the other three easel cards.


9. Before securing the easels to your card base, do a "dry run" to figure out the correct placement. There are a couple of ways to add your easels - in a pinwheel, which is what I've chosen, or all facing the same direction. If you want your easels to face the same direction, simply secure them to the 6" x 6" base in the same orientation.


10. To form the pinwheel, the easels need to be rotated a quarter turn each time. However, you must place them correctly so that they are able to fully open and not get in the way of the easels either side.
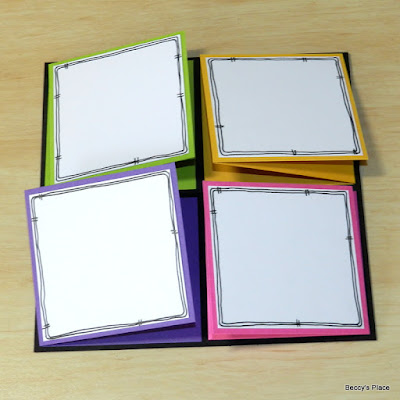
Open each easel. You'll see that the diagonal score line starts on the centre fold. Place this section of the easel in the corner of your card base. (For example, I'm placing the purple easel at the bottom left corner of my card base. I'll rotate the pink easel a quarter turn so that the diagonal score line is next to the bottom right corner of my card base. I'll rotate the yellow easel a quarter turn so that the diagonal score line is next to the top right corner of my case base, and then rotate the green easel so that the diagonal score line is next to the top left corner of my card base.)


11. Apply glue to the back of each easel and secure to the card base.


12. Time to decorate! I've added white cardstock with hand drawn borders and individual balloons, coloured to match the cardstock. Remember to match the decorations to the orientation of each easel.


13. The final step is to add our anchors. These are dimensional elements that hold the easel cards open. You don't want them to be too thick, as they are placed on the inside of each card, but you do want them substantial enough to hold the card open. I've used sentiments from the same digital set, printed, mounted on cardstock and applied with a little foam tape.


Digital Stamps: