One of my Guest Designers this month, the fabulous Iako, created this beautiful mini album using the new "Bear With Me" digital set. She used a different teddy bear on each page to produce a wonderful keepsake for a new baby, or to give as a gift to a proud new Grandma!
Friday, May 31
Thursday, May 30
Colour Challenge Conniption
This week's Card Camp challenge was a tricky one for me... I almost had a conniption when I saw the colour swatch! We had to work with a palette of lime green, turquoise and yellow, which are not colours I usually go for. I much prefer browns, dusty pinks and greens. Anyway, I dragged out all the inks, cardstock and patterned papers I had and was surprised to find quite a few items in the appropriate colours. A bit of stamping, a bit of cutting, bow tying and layering and I had a card in all the right colours that hadn't actually caused me any physical harm... but I am retreating to my comfort zone for the rest of the day!
Monday, May 27
Bird Song Cards
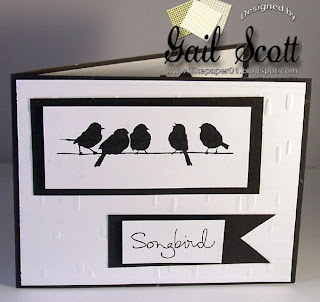
My wonderful designers have another round of Bird Song projects to show you this week. They've used the Bird Song Set of digital images I showed you a couple of weeks ago to create their beautiful cards.
Carla's Card
Emily's Card
Malin's Card
Annie's Card
Marianne's Card
Gail's Card
Two cards from Iako...
... and two cards from Pauline.
Clean and Simple Poppy Cards
I was playing around with some very simple images the other day and decided to make them into clean and simple cards. A splash of ink and a length of string tied into a bow finished them off nicely... if I may say so myself.
Stamps by Stampin' Up
Friday, May 24
Heartfelt Wishes
This week our Card Camp challenge was to CASE (Copy And Selectively Edit) a beautiful card chosen by the group owner. The card used for inspiration featured layers of die cut cardstock with a beautiful stamped floral feature at the top. I used my favourite shaped die and a new Stampin' Up set I just purchased to create my challenge card.
Thursday, May 23
Tutorial - Gatefold Window Card
These beautiful cards are wonderful for so many occasions and with the large range of dies on the market you are only restricted by your imagination! Although they aren't quick and easy to make, the end result definitely makes the effort worthwhile.
1. Start by making a basic gatefold card. The easiest way to do this is to start with a strip of cardstock measuring 6" x 12" (this will give you a 6"x6" square card). Use a pencil to mark the centre of the strip and then fold each side into the centre. Using this method you can make gatefold cards of any size.
2. Cut three pieces of patterned paper slightly smaller than your card blank. My card is 6" x 6", so my patterned paper measures 53/4" x 53/4". I used a piece of double sided paper so that I could co-ordinate the inside and the outside of the card.
3. Place your favourite die in the centre of the inside of the card.
The cutting side of the die must be facing UP.
4. Secure the die in place using removable tape such as washi tape or magic tape. Remember that your die is facing cut side up, so the tape will end up being cut as well.
5. Secure a piece of patterned paper on the front of the card over the opening.
6. Place the card and patterned paper through the die cutting machine. The die will cut through the two side flaps of the card as well as the piece of patterned paper.
7. Place the die back over the patterned paper and trace around the edge. You will cut this away later to get a lovely border.
8. Cut the patterned paper exactly in half. You are also going to remove a little bit of paper from the top and bottom where it joins. This will keep the border continuous around the card. I trimmed about 1/8" from either side.
9. Use a small pair of sharp scissors to trim around the pencil line you drew in step 7.
10. Using the same die, cut another window in one of the other pieces of patterned paper. Repeat steps 7 - 9. Now you will have a card blank, four pieces of die cut paper and a 53/4" square of patterned paper. If you would like to ink the edges of your paper and cardstock, now is the time.
11. Adhere the co-ordinating paper to the inside of the card.
12. Adhere the patterned paper to the outside flaps.
13. Now it's time to decorate! Keep in mind that the image or sentiment you place in the centre will be visible when the card is closed. It's a good idea to decorate the card while it's closed, that way you won't have anything overlapping and preventing the card from opening and closing properly.
14. Add some embellishments to the front and you're done!
Stamps:
Monday, May 20
New Release: Bear With Me
This Teddy Bear set is new in store today and contains five images with four matching sentiments. They would be great for children's cards, Father's and Mother's Day cards, or the birth of a new baby.
DIGITAL IMAGE SET
The designers have put together some wonderful cards again this week to give you ideas and help inspire you to create your own paper craft projects.
Annie's Card
Carla's Cards
Malin's Card
Marianne's Card
Christine's Card
Gail's Card
Labels:
bears,
design team cards,
digital image,
new release
Subscribe to:
Posts (Atom)


